
Mr Softwash®Miracle Wash
"Voted Soft Washing Company of the year 2024/25 & 25/26"
Mr Softwash®Miracle Wash
"Voted Soft Washing Company of the year 2024/25 & 25/26"
Softwashing is essential in the UK for
safely removing algae, moss, and lichen from delicate surfaces like render, roofs, and cladding without the damage caused by high-pressure washing. It uses biodegradable, low-pressure solutions to kill organic growth at the root, lasting up to 5 years while protecting property value.
Here is why you should consider softwashing your property in the UK:
When to Softwash
Softwashing is ideal for UK homes, particularly in spring to remove winter grime, or in autumn to prepare for harsher winter elements.
The modern, technologically advanced, process of soft washing reduces, and even eliminates, the need for jet – or pressure/power – washing in most situations.
Soft washing is the process of using eco-friendly chemicals and low-pressure water to clean the surfaces of buildings and driveways.
Soft washing will not damage your property. It's effectiveness depends upon the cleaning contractor having the skilled knowledge of how to use the correct cleaning product at the correct concentration ratio, using the correct equipment.
Softwash Long Term Protection for 3-5 Years
Soft washing biocides provide long-term protection by
killing organic organisms—such as algae, moss, fungi, and lichen—at their root and leaving a residual film that prevents regrowth.
How Biocide Protection Works
Is Soft washing with biocide
the best method for cleaning render?
Yes, bleach can damage render if used incorrectly, primarily through discolouration and surface degradation. While sodium hypochlorite (the active ingredient in bleach) is a standard professional tool for "soft washing," bleach is often too strong or if used at improper dilutions for delicate surfaces like Krend and Monocouche renders.
How Bleach Can Damage Render
Steam cleaning render
Steam cleaning ( Doff/Torc ) render is highly effective for removing heavy carbon staining or paint, but lacks the long term residual protection against algae that biocides provide.
soft washing with a biocide is widely considered the best and safest method for cleaning modern exterior renders like K-Rend and Monocouche.
Guide To Soft washing
The world of Softwashing, a revolutionary cleaning technique that's taking the UK by storm. Your guide through the ins and outs of this gentle yet highly effective method for rejuvenating your home's exterior. We're diving deep into the most common questions about Softwashing. And remember, for all your Softwashing needs, Mr SoftWash Ltd has got you covered with the best products in the market.
What is Meant by Soft Washing?
Softwashing is a cleaning process that uses low-pressure water combined with specialized cleaning solutions to remove dirt, grime, algae, and moss from exterior surfaces. Unlike traditional cleaning methods, Softwashing is gentle on your property's surfaces, making it ideal for delicate materials. The top product, biocide, is a perfect example of the effectiveness of Softwashing solutions.
Is Soft Washing Better Than Pressure Washing?
While pressure washing uses high-pressure water to blast away dirt, Softwashing takes a more gentle approach, using cleaning solutions to do the heavy lifting. This means less risk of damage to your property and a more thorough clean, as the solutions can kill off spores and prevent regrowth. For many, Softwashing is indeed a better, safer choice.
What Are Soft Washing Techniques?
Softwashing techniques involve applying cleaning solutions at a low pressure, allowing the solution to dwell on the surface to break down the dirt and organisms present. After the solution has done its work, the surface is gently rinsed with low-pressure water. Techniques vary depending on the surface being cleaned, but the principle remains the same: gentle and effective cleaning.
What Do Professionals Use to Soft Wash a House?
Professionals use a combination of low-pressure washing equipment and specialized cleaning solutions tailored to the surface being cleaned.
Is Soft Washing Cheaper Than Pressure Washing?
The cost can vary depending on the job's complexity and size. However, Softwashing can be more cost-effective in the long run due to its long-lasting results and the reduced risk of damage to your property, which can lead to costly repairs.
Does Soft Washing Use Hot Water?
Typically, Softwashing is done with cold or lukewarm water, as the cleaning power comes from the chemical solutions rather than heat. This makes it more energy-efficient and suitable for a wider range of exterior surfaces.
Is Soft Washing Effective?
Absolutely! Softwashing not only cleans surfaces but also sanitizes them, killing off algae, mold, and other organisms. This means surfaces stay cleaner for longer, making Softwashing an incredibly effective method for maintaining your property's appearance and health.
Softwashing is changing the game in property maintenance, offering a safer, more effective way to keep your home looking its best.
Softwash Biocide can be used in Two ways:
1. As a stand-alone soft wash treatment of external hard surfaces. Simply apply and let mother nature do the work. You’ll notice dramatic results within 14 days, with the full process lasting for several months. The longevity of the clean will be far greater than that obtained from power washing or bleach.
We particularly recommend this approach on surfaces for which power washing would be contra-indicated, such as soft stone and render. Or when a customer does not want a chlorine-based product used.
2. As a post-treatment after initial cleaning with Sodium hypochlorite ( Bleach ).
Didecyl Dimethyl Ammonium Chloride (DDAC) biocide works in two distinct phases: it kills biological growth within minutes, but the visible cleaning effect can take weeks or even months as dead organic matter naturally weathers away.
1. Biological Kill Time (Immediate)
DDAC is a rapid-action disinfectant that begins disrupting microbial membranes immediately.
Unlike bleach-based cleaners that provide instant visual whitening, DDAC relies on "self-cleansing" through weather cycles (rain and sun) to remove dead debris.
Application Best Practices for Speed
is a professional exterior cleaning service based in Poole, Dorset & working across the South of England that uses specialized low-pressure techniques to clean and protect delicate surfaces. This "Miracle Wash" process relies on biodegradable chemical solutions, such as biocides and surfactants, to kill organic growth like algae, moss, and lichen at the root, providing results that typically last 3 to 5 years.
Key benefits of Biocide
'Miracle Wash'
Don't Paint Render, Clean it !
Cleaning render instead of painting it preserves its natural breathability, water repellency, and textured finish, avoiding the maintenance cycle of flaking paint. Use specialized soft-washing with biocides to remove algae, moss, and dirt, restoring the original colour without causing damage.
Why Clean Instead of Paint
Best Practices for Cleaning Render
When Painting Might Be Needed
If the render is already painted and that paint is failing, or if you need to drastically change the color, painting might be the only option. In such cases, the render must be thoroughly cleaned, repaired, and treated for algae first.
The most important thing to consider in my opinion is, will you do it yourself? or would you prefer an industry leading soft washing expert take care of it properly?
There is only one way to safely clean any type of through coloured render and that is to use a soft wash mix. A soft wash mix consists of 97% water, 2% sodium hypochlorite and 1% Green Wash. Combined and SPRAYED on (which brings Oxygen into the mix) kills off all organic matter which has infested the render. Once applied a dwell time of fifteen to twenty minutes is usually fine to give optimal clean results.
K-Rend render cleaning is safe when the correct soft wash method is used…
K-Rend render is designed to look clean, bright and modern, yet many UK homes see algae, staining and weathering long before they expect it.
If your walls are starting to look dull, patchy or green, you are not alone.
The good news is that K-Rend can be cleaned safely when the right soft wash method is used.
This guide explains exactly how to protect your render, avoid costly damage and keep your home looking fresh for years.
What Is K-Rend Render?
K-Rend is a silicone-based, through-coloured render used widely across the UK for its clean finish, breathability and weather resistance.
Although marketed as low-maintenance, K-Rend is not maintenance-free.
Exposure to moisture, shade, trees, coastal air and rainfall can all lead to algae growth and discolouration over time.
Understanding what K-Rend is made from helps explain why using the right soft wash method is essential.
Why Does K-Rend Get Dirty?
Most staining on K-Rend comes from algae, mould, moisture and airborne pollutants.
These start as small patches and gradually spread across shaded or damp walls.
Pressure washing forces water into the surface and can cause damage, which is why a controlled soft wash method is recommended.
Knowing the cause of the staining helps you understand the safest way to remove it.
How to Clean K-Rend Render Safely
K-Rend can be cleaned safely when the correct soft wash method is used.
The goal is simple. Remove algae, staining and organic growth without damaging the surface or forcing water into the render.
This is why we never use pressure washing on K-Rend. High pressure can strip the surface, cause cracking and drive moisture behind the render.
A proper K-Rend clean starts with understanding how the wall absorbs water.
Every project should begin with a porosity test.
This allows the cleaning technician to judge how the render reacts to moisture and ensures the solution is applied safely and evenly.
Once the surface is assessed, we apply a carefully prepared soft wash mix using low pressure.
This removes algae, mould and organic growth gently, allowing the render to return to a clean, bright and even finish.
Soft washing is the safest, most effective and most controlled method for cleaning K-Rend render on UK homes.
K Rend Render Cleaning
Step-by-Step: The Safe Way to Clean K-Rend Render
Cleaning K-Rend is not complicated, but it must be done correctly.
Here is the safe soft wash process used by trained render cleaning technicians on UK homes.
1. Initial Inspection
Every project begins with a visual inspection of the K-Rend surface.
We look for algae, black staining, patchiness, cracks, damaged areas and signs of water retention.
This helps us understand how the wall will respond to cleaning.
2. Porosity Test
A porosity test is essential for K-Rend.
It shows how quickly the render absorbs moisture and helps us choose the right strength of soft wash solution.
This protects the surface from over-saturation and ensures an even, consistent clean.
3. Preparing the Soft Wash Solution
For K-Rend, we use a carefully measured mix of sodium hypochlorite, water and surfactant.
This breaks down algae, mould and organic growth without damaging the render.
The mixture is always applied at low pressure.
4. Applying the Soft Wash Solution
The solution is sprayed gently onto the K-Rend wall.
There is no force, no blasting and no abrasion.
The soft wash mix begins working immediately, lifting stains and organic growth from the surface.
5. Allowing Time to Work
The solution needs time to dwell so it can reach into textured areas and remove deeper organic growth.
Dwell time varies depending on shading, contamination and weather conditions.
6. Rinsing and Final Clean
Once the solution has done its job, the wall is rinsed using low pressure.
This removes residue and reveals a cleaner, brighter K-Rend surface.
No pressure washing is ever used.
7. Optional: Hydrophobic Protective Coating
After cleaning, many homeowners choose to protect their K-Rend with a hydrophobic coating.
This helps prevent algae regrowth, reduces staining and keeps the render looking cleaner for longer.
You can learn more about this treatment on our
Hydrophobic Protective Coating page.
Following these steps ensures that K-Rend render is cleaned safely, effectively and without damage.
This method is trusted by homeowners who want long-lasting results without risking their property.
What NOT to Do When Cleaning K-Rend Render
K-Rend is strong, but it is not designed to withstand harsh cleaning methods.
Many homeowners unintentionally damage their render by using the wrong approach.
Here are the most common mistakes to avoid.
1. Do NOT Use a Pressure Washer
High-pressure cleaning can cause serious damage to K-Rend.
It forces water behind the render, strips the surface and creates cracking or blown sections.
K-Rend should only ever be cleaned using a controlled soft wash method.
2. Do NOT Use Bleach Straight From the Bottle
Household bleach is too strong and unpredictable.
It can cause patchiness, permanent discolouration and surface damage.
A professional soft wash uses a carefully measured sodium hypochlorite mix designed for exterior surfaces.
3. Do NOT Scrub the Render
Scrubbing can damage the texture of the render and spread stains.
K-Rend is not meant to be abraded.
Soft washing removes organic growth without physical force.
4. Do NOT Clean K-Rend Without a Porosity Test
A porosity test ensures the render absorbs moisture evenly.
Skipping this step can lead to streaking, uneven results and water retention in the surface.
Every professional K-Rend clean should begin with a porosity test.
5. Do NOT Use Random Chemicals
Some cleaning products react badly with silicone-based renders.
Only use approved soft wash solutions mixed at safe, controlled strengths.
The wrong chemical can cause long-term damage that cannot be reversed.
6. Do NOT Ignore Shaded or Damp Areas
Algae grows fastest on shaded or damp walls.
These areas need targeted treatment to prevent regrowth.
A full clean should treat all affected surfaces, not just the visible patches.
Avoiding these mistakes ensures your K-Rend stays clean, bright and structurally sound for years to come.
Common K-Rend Problems and How Soft Washing Fixes Them
K-Rend is a high-quality render, but like any exterior surface it can develop visible issues over time.
Most problems come from moisture, shade, organic growth or airborne pollutants.
Here are the most common issues homeowners see and how soft washing resolves them safely.
1. Green Algae Growth
Green algae is the most common problem on K-Rend, especially on shaded or north-facing walls.
Soft washing removes algae at the root and prevents rapid regrowth.
Pressure washing only removes the surface layer, meaning the algae returns quickly.
2. Black Mould or Black Streaking
Black staining happens when algae, moisture and pollutants build up over time.
It often looks worse than green growth but responds extremely well to soft washing.
The low-pressure chemical clean breaks down the organic material and restores a consistent colour.
3. Patchy or Uneven Colour
Patchiness usually appears when one area of the wall receives more shade or moisture than another.
Soft washing evens out the surface appearance by treating all affected zones thoroughly and consistently.
4. Red or Rust-Coloured Stains
Red staining is caused by a specific type of algae that thrives in moist conditions.
Soft wash treatment is the safest and most reliable way to remove it without damaging the silicone-based render.
5. Weathering and Dull Surfaces
Over time, K-Rend can lose its crisp, clean look due to pollution and environmental exposure.
Soft washing removes surface contaminants, brightens the finish and restores the “as new” appearance.
6. Moss Growth Near Ground Level
Where walls meet soil, pathways or planting areas, moss can develop.
Soft washing breaks down the moss structure and removes it gently without scraping or abrasion.
These issues are normal and predictable, and the good news is that soft washing is specifically designed to fix them safely.
How Often Should K-Rend Be Cleaned?
Most K-Rend surfaces benefit from a professional clean every two to three years.
Homes in shaded areas, coastal locations or properties surrounded by trees may need more frequent cleaning, sometimes every 12 to 18 months.
Sun exposure, moisture, airflow and rain patterns all affect how quickly algae grows.
The good news is that once K-Rend is cleaned using a safe soft wash method, it tends to stay bright for a long period.
Many homeowners choose to add a hydrophobic protective coating after cleaning, which reduces moisture absorption and slows down algae regrowth dramatically.
Regular maintenance not only keeps your home looking fresh, it also protects the render and helps extend its lifespan.
A simple soft wash clean at the right interval can save you thousands in unnecessary repairs.
Further Guidance for K-Rend Care
If you want to understand more about how K-Rend should be maintained, the manufacturer provides clear guidance on cleaning and long-term care.
Following these approved methods ensures your K-Rend render is looked after correctly and stays brighter for longer.
K-Rend Render Cleaning – Frequently Asked Questions
Can K-Rend be cleaned safely?
Yes. K-Rend can be cleaned safely using the correct soft wash method.
The key is low pressure, a controlled cleaning solution and a porosity test before starting.
Will soft washing damage my K-Rend?
No. Soft washing is the safest method for K-Rend when carried out by trained technicians.
It removes algae and staining without abrasion or water pressure.
Why is my K-Rend turning green?
Green staining is caused by algae growth in areas with moisture, shade or poor airflow.
Soft washing removes algae at the root and restores the original colour.
How long will my K-Rend stay clean?
Most homes stay clean for two to three years after a soft wash.
Adding a hydrophobic protective coating can extend this period further by reducing moisture absorption.
Can I pressure wash K-Rend?
No. Pressure washing can cause serious damage, including cracking, surface loss and water penetration behind the render.
It should never be used on K-Rend.
For the best, longest-lasting, and safest results,
a Biocide is superior to bleach (sodium hypochlorite) for soft washing render. While bleach provides an immediate, bright clean, specialized biocides offer deep, residual protection (often 2–3 years) by killing spores, rather than just bleaching them.
Biocide vs. Bleach Breakdown:
Best Practice Strategy:
Key Precautions:
Expert Softwash Render Cleaning in Dorset, Hampshire & UK
soft washing with a biocide is widely considered the best and safest method for cleaning modern exterior renders like K-Rend and Monocouche, brickwork, stonework, cladding, decking, plastics, metals, resin driveways & most surfaces.
www.mrsoftwash.co.uk
Common exterior wall renders in the UK include durable, water-repellent silicone (25-30+ year life), through-coloured monocouche (15-20 year life), traditional breathable lime for period properties, and flexible, modern acrylics. These systems protect against damp, with modern options reducing the need for painting.
Key Types of Render in the UK
Popular Finishes and Application Methods
Considerations for UK Climate
Due to the wet and variable climate, silicone and polymer-modified renders are favored for their longevity, flexibility, and ability to prevent cracking.
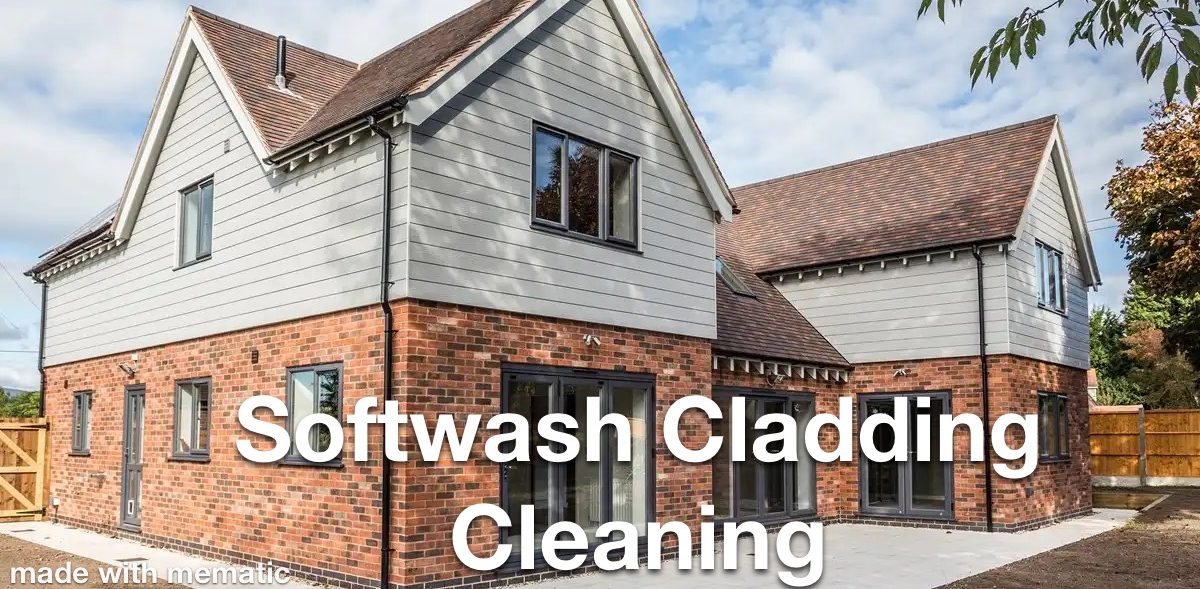
Softwashing is the preferred professional method for cleaning exterior cladding in the UK because it
uses low-pressure water and specialized biocides to kill organic growth (like algae and moss) at the root without damaging delicate surfaces like wood, uPVC, or composite.
Core Benefits and Process
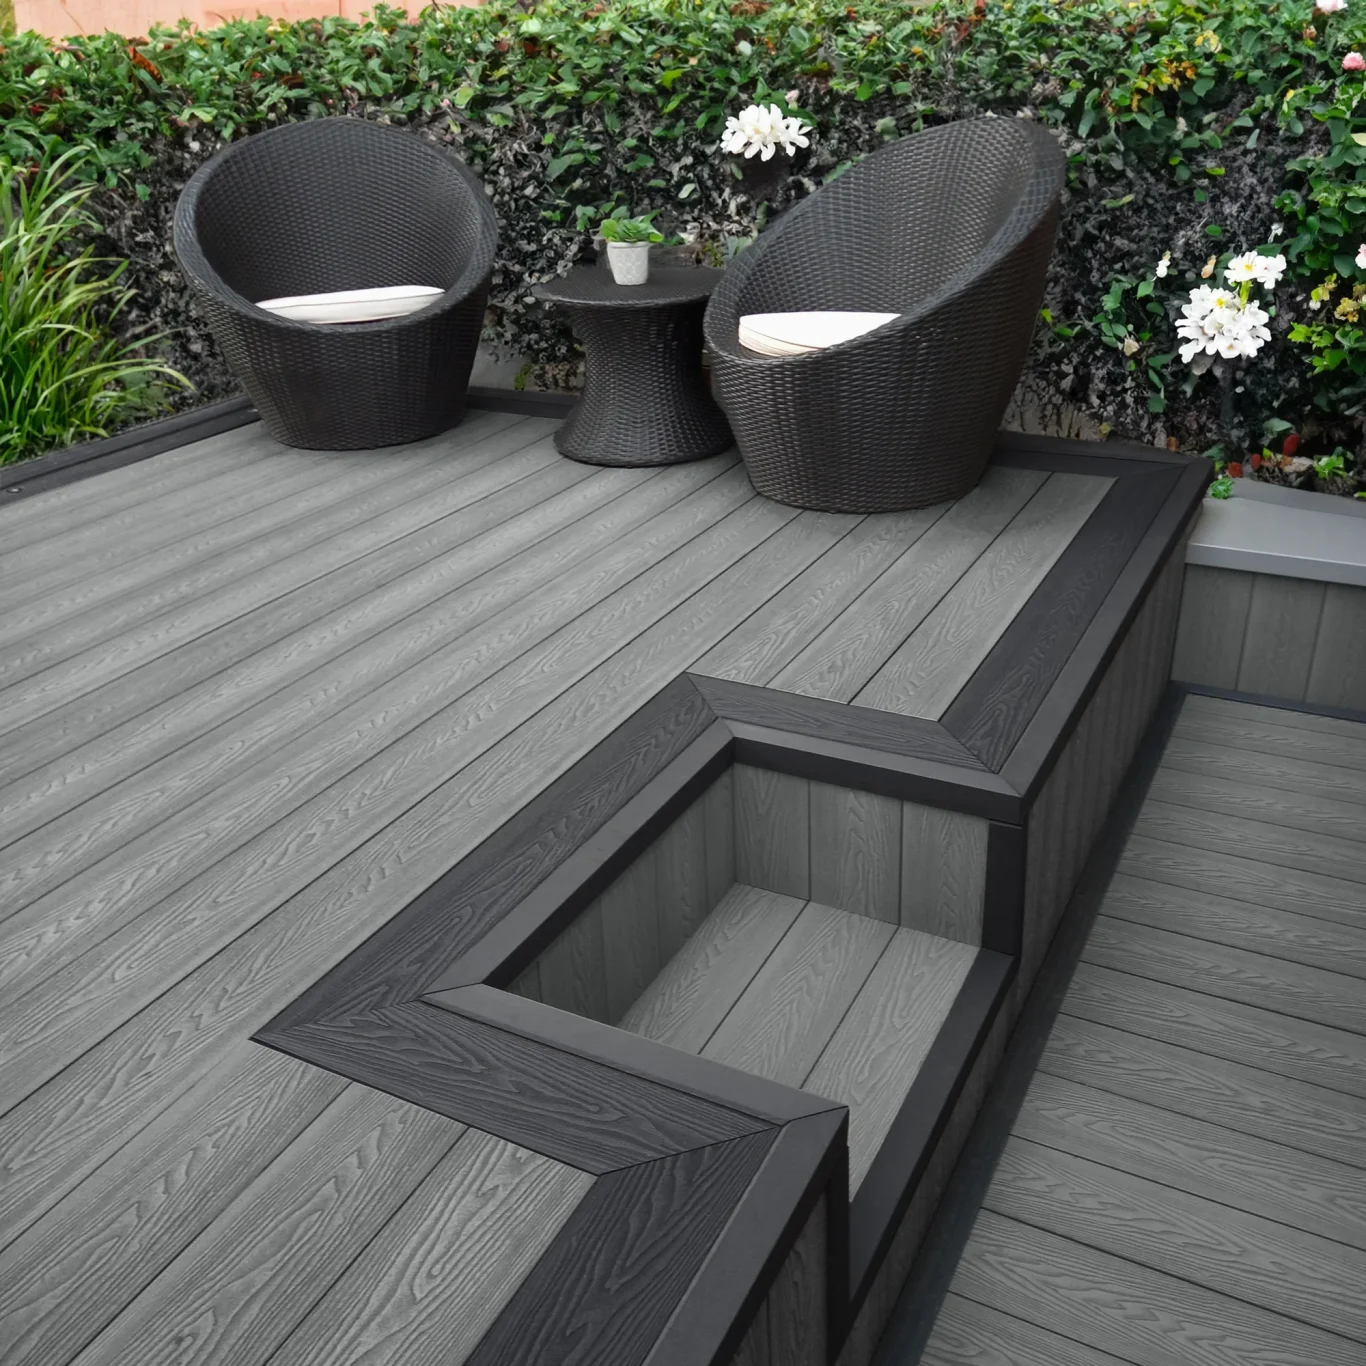
Softwash decking cleaning in the UK is
a low-pressure alternative to traditional jet washing that uses biodegradable biocides to kill organic growth like algae, moss, and lichen at the root. Unlike high-pressure methods, it avoids tearing wood fibres or stripping protective coatings, with results often lasting 3 to 5 times longer due to the residual protective film left by the chemicals.
why is it best to use a trained
soft washing operator ?
Using a trained soft washing operator is best because
they have the expertise to safely apply the correct chemicals and techniques, preventing costly property damage and ensuring a longer-lasting, thorough clean. Untrained use of chemicals and equipment can pose significant safety and damage risks.
DIY chemicals are also a fraction of the strength of professional use chemicals and therefore do not work as well and for as long as professional chemicals.
Trained soft washing operators have the chemical training & knowledge to use the correct professional chemicals in the correct ratios safely and not just make it up as they go along.
Property Protection & Expertise
Trained operators understand the specific needs of different surfaces (e.g., render, slate, wood, concrete), and adjust their methods accordingly to prevent damage.
Superior & Long-Lasting Results
Professionals provide a deeper clean that lasts significantly longer than DIY efforts.
Health & Safety
Exterior cleaning, especially at heights and with chemicals, carries inherent risks that professionals are trained to manage.
By hiring a trained soft washing operator, you save time, avoid the hassle of purchasing or renting expensive commercial-grade equipment, and ensure your property is cleaned effectively and safely.
why is soft washing the best way
to clean hard surfaces ?
Soft washing is an excellent method for cleaning hard surfaces because
it uses low pressure combined with specialized cleaning solutions to kill organic growth at its source, providing a deeper, longer-lasting clean without the risk of damage associated with high-pressure washing.
Core Differences and Benefits
The key difference lies in the mechanism of cleaning. Pressure washing uses mechanical force (high-pressure water) to blast away surface dirt, which can damage materials or force water into cracks. Soft washing, by contrast, uses the "brainpower" of chemicals, relying on a cleaning solution's dwell time to break down contaminants before a gentle rinse.
In sum, for most applications involving organic growth and general dirt, soft washing is superior for its safety, effectiveness, and long-term results on all types of hard surfaces.
In 2025, soft washing news
focuses on the method's increasing popularity as a safer and more effective alternative to pressure washing, legal and environmental considerations for cleaning agents, and business growth strategies.
Key 2025 Soft Washing News and Trends
Overall, the 2025 soft washing conversation revolves around professionalization, safety, and establishing it as the superior method for delicate exterior surfaces compared to high-pressure washing
softwash news 2026
The latest softwash news for 2026 focuses on
environmental responsibility, business growth through service expansion, and industry trends.
Key Softwash News & Trends for 2026

WHAT IS SOFT WASHING?
Softwashing is the non-destructive alternative to pressure washing. Softwashing takes a scientific approach to cleaning by using quality eco-friendly Softwash products blended for all kinds of projects. Softwashing is the science behind organic growth, this gives a greater understanding into the most likely causes of organic growth and discolouration. Most of the dirt on properties is living organic bio film or carbon. Our industry leading Softwashing system uses a water-based, biodegradable chemical that emulsifies dirt, killing algae, lichen, moss, mould & bacteria. This solution sanitises the surface leaving long lasting results. Unlike pressure washing, Softwashing doesn’t erode the surface and uses one-third of the water that pressure washing would. Softwashing is the preferred method for cleaning your home or business and the results can last upto 3-4 times longer. Mr Softwash Ltd has invested in the worlds BEST SOFTWASHING EQUIPMENT to enable us to make your surfaces and buildings super clean.
Why Soft Washing?
In simple terms, soft washing is less likely to damage property and the results can last up to 3-4 times longer than pressure washing. Homeowners are becoming more aware of the damage pressure washers and untrained operators can do to there home, damaging render, roofs, brick and stonework as well as damaging pointing on patios to give a few examples. Using soft washing equipment, chemicals are applied using no more pressure than a garden hose. These chemicals are then brushed in to the target surface and then washed off using once again no more pressure than a garden hose. The skill is having the soft washing training to know how to use the correct chemicals in the correct ratios on the correct surface. That's why it is important to use a trained soft washing operator and not someone who happens to have a pressure washer.
Mr Softwash®
Is Soft Washing Safe for the Environment? 🌍 Eco-Friendly Exterior Cleaning Explained
📘 Education: Best Practices for Greener Soft Washing
"Only use trained Soft Washing Operators"
Trained operators have trained to understand the correct chemicals to use on the right product in the right ratio.
Understanding how to soft wash safely is key. Here are eco-friendly best practices to follow:
🌟 Conclusion: Soft Washing IS Eco-Friendly – When Done Right
Soft washing is not only effective for preserving your property—it can do so without harming the environment. By using biodegradable products, applying them responsibly, and getting the right training, anyone can soft wash sustainably.
Let’s recap why soft washing is a green cleaning choice:

Why Soft washing is More Than Just Cleaning’, is provided by Mr Softwash, who offer professional softwashing services. We are committed to advancing the field of softwashing through continuous innovation and reliable customer service.
Introduction
Softwashing is advancing exterior cleaning by offering a safer, and potentially more effective alternative to pressure washing. This method not only cleans surfaces but also eliminates organic growth at the root, preventing rapid regrowth. Unlike traditional pressure washing, which relies on force to remove dirt and biological growth, softwashing utilizes specially formulated cleaning agents that break down contaminants at a molecular level.
The effectiveness of softwashing is based on science—specifically, the chemistry of cleaning agents, the role of surfactants, and the correct application techniques. By understanding how these elements work together, professionals can achieve long-lasting, environmentally responsible results without damaging delicate surfaces.
In this article, we’ll explore the key scientific principles behind softwashing, including the chemistry of its cleaning agents, its best application practices, and important environmental and safety considerations.
The Chemistry of Softwashing
The primary reason softwashing is an effective alternative to pressure washing lies in the chemistry behind its cleaning solutions.
The Role of Sodium Hypochlorite (NaOCl)
How Sodium Hypochlorite Works
When applied to a contaminated surface, sodium hypochlorite breaks down organic material at the cellular level. It disrupts the biological processes of algae and fungi, killing them at the root rather than just removing their surface layer (as pressure washing does).
Once the organic matter is broken down, a low-pressure rinse removes the debris, leaving a cleaner and longer-lasting finish. Because the spores and root systems of contaminants are eliminated, surfaces remain cleaner for months or even years without the need for frequent re-treatment.
The Role of Surfactants in Softwashing
Surfactants are another crucial component in softwashing solutions. These compounds lower water’s surface tension, allowing the cleaning agents to:
Surfactants are often used to help softwashing solutions spread more effectively over surfaces, particularly on vertical structures like walls and roofs. By improving adhesion, surfactants ensure that the cleaning agents stay in place long enough to fully break down organic contaminants.
Application Techniques and Best Practices
Softwashing requires a very different approach compared to pressure washing. High-pressure jets can cause damage to surfaces, particularly on delicate materials like:
Softwashing eliminates these risks by using low-pressure spray systems that gently apply the cleaning solution.
The Importance of Dwell Time
One of the most important factors in successful softwashing is the dwell time—the amount of time the cleaning solution remains on the surface before rinsing.
Dwell time varies depending on the surface and contamination level:
Allowing the solution to dwell properly ensures that contaminants are fully broken down rather than just partially removed. However, it’s important not to let the solution dry on the surface, as this can leave streaks or cause uneven cleaning.
Rinsing and Post-Cleaning Treatments
Once the dwell time is complete, the surface is rinsed with low-pressure water. This removes the broken-down contaminants while protecting the surface from damage.
To extend the longevity of the clean, many professionals apply a biocide after softwashing. Biocides such as DDAC (Didecyldimethylammonium Chloride) can prevent regrowth of algae, mold, and moss for up to a year or longer.
Conclusion
Softwashing is more than just an exterior cleaning method—it is a science-based approach that ensures long-lasting, deep-cleaning results while protecting delicate surfaces. By understanding the chemistry of sodium hypochlorite, the role of surfactants, and the importance of proper application techniques, professionals can deliver cleaning services safely and effectively.
More than just removing dirt, softwashing prevents regrowth, reduces the need for frequent maintenance, and provides a sustainable, environmentally friendly solution for exterior cleaning.
As more professionals embrace the scientific principles behind softwashing, the industry continues to shift toward a safer, smarter, and more effective cleaning standard.

The Complete Guide to Render Cleaning:
What Homeowners Need to Know
Every home looks impeccable when it has a clean, aesthetic render. The UK's damp climate doesn't make keeping the render in good condition easy—algae, moss, dirt, and pollution will stain it. If not addressed, your home's kerb appeal and render will suffer, and so will your property's value. Knowing how to clean the render is paramount, regardless of whether you live in a traditional cottage or a modern new-build. From identifying the type of render to spotting its first signs of wear, our render cleaning guide will walk you through everything you need to know about caring for and cleaning your render. By the end, you'll know what to do next when you go outside and check out your house.
Key takeaways
Types of render standard in the UK
You cannot start cleaning your render when you don’t even know its type.
Modern render systems
The sleek appearance, long lifespan, and lower maintenance requirements make modern render systems popular among UK homeowners, particularly when compared to traditional types of render. Each of the modern render systems comes with particularities and unique cleaning issues:
K Rend (Silicone Render)
K Rend is a silicone-based render widely used in the UK. Marketed as “self-cleaning”, K Rend has hydrophobic properties that help rainwater wash away some dirt. This doesn’t mean the algae or red or green staining will no longer build up over time—they will, especially in shaded areas and on north-facing walls. Low-maintenance, K-Rend still requires cleaning with soft washing techniques and non-abrasive, render-safe solutions.
Monocouche Render
Monocouche means “single coat” in French, and this decorative, breathable finish only needs one application. Painting isn’t necessary, as it’s typically pre-coloured, but it’s highly porous, so that it will show signs of algae growth and discolouration. Since it’s fragile, monocouche render doesn’t withstand high-pressure washing. To maintain its structure and appearance, only soft washing or gentle chemical cleaning should be used.
Acrylic Render
Flexible and resistant to cracking, acrylic render is an excellent option in areas with frequent temperature fluctuations or movement in the building structure. Acrylic render ensures efficient weather resistance, but it’s prone to collecting dirt in its finish (rather tacky). Additionally, it will degrade from aggressive cleaning, so pressure washing should be avoided—it will strip away the surface layer or cause patchy discolouration. The best way to clean acrylic render is soft brushing with render-safe detergents.
Traditional render types
Traditional render systems have been used for many years across UK homes, especially for period properties. Although they lack the flexible or self-cleaning characteristics of modern systems, they are often more reliable in specific scenarios. Of course, each type comes with its risks and cleaning needs.
Sand and cement render
Widely used and time-tested, sand and cement render is appreciated for its strength and affordability. Its coarse, textured finish collects dirt and will handle careful pressure washing. It’s one of the renders that withstands DIY cleaning with a pressure hose. Hairline cracks are signs of age, so repairing them before cleaning will be necessary.
Lime render
Common on period or listed buildings, lime render is flexible, breathable, and eco-friendly. It is also delicate and won’t withstand harsh chemicals and mechanical cleaning methods. Pressure washing is an oversized “NO”—only gentle, non-invasive methods, such as specialist steam cleaning and soft brushing, can be used. Stay on the safe side and consult a conservation expert before cleaning, as incorrect care may compromise the building’s ability to “breathe” and handle moisture.
Polymer render
A relatively new development, polymer render combines traditional techniques with modern materials. The added polymers make it flexible and water resistant, and the polymer render lasts longer than plain sand and cement. Follow the manufacturer’s specific instructions when cleaning polymer render—some products can be handled with soft washing, while others require gentle handling due to chemical sensitivities and finish coatings. To avoid voiding the warranty or causing damage, consult a render specialist or review the documentation before cleaning polymer render.
Textured finishes
Pebbledash, roughcast, Tyrolean, and other textured finishes can be seen on many UK homes, particularly post-war builds and properties in coastal or exposed areas. Durable and weather-resistant, the textured finishes have specific cleaning difficulties.
Pebbledash & roughcast
Small stones or gravel are thrown or embedded into wet render to achieve a pebbledash or roughcast effect. The finish is long-lasting, resistant to harsh weather, and conceals imperfections. Cleaning such finishes is another story. The uneven texture collects dirt, moss, and algae, especially in damp and shaded areas. Therefore, pressure washing and other aggressive methods will dislodge the stones, causing bald patches that are difficult to repair seamlessly.
Low-pressure soft washing is the safest cleaning method. A fungicidal or biocidal treatment formulated for render can be used to kill organic growth without blasting away the finish. You can use a stiff (not metal) brush to gently scrub the finish, without chipping or scraping the surface. For large or soiled areas, it’s better to call in the pros.
Tyrolean render
Tyrolean render is a spray-applied finish that creates a unique textured coating. Often seen on mid-century homes, Tyrolean render is more uniform than pebbledash, yet still has a bumpy texture. More stable than pebbledash, Tyrolean render does trap airborne dirt, algae, and staining and needs gentle, non-invasive cleaning.
You may use pressure washing at very low pressure to avoid surface damage. Ideally, employ soft washing with a correct render-safe cleaning solution and light brushing. Tyrolean may stain in patches (especially in shaded and urban environments), so hire professional cleaners from time to time for a consistent look and to preserve texture.
Extra tip
With textured render, the aim is to clean carefully, but thoroughly, preserving the finish while removing biological growth and grime. Always choose cleaning methods based on the surface’s fragility and avoid DIY methods on large and visible areas.
When does your render need cleaning?
Spotting problems early reduces the risk of long-term damage to your render and the underlying structure.
Visual red flags
Discolouration
A render changing its colour is a sign that it needs attention. Surface dirt, air pollution, or UV exposure cause dull, grey, uneven patches, especially if the render is pre-coloured, such as K Rend or monocouche. Even if it’s a cosmetic problem at first, ignoring discolouration can worsen in time and affect the home’s curb appeal.
Algae growth
Typically, shaded or moisture-retaining surfaces will show algae as greenish tints or slimy patches. Although it’s not unsightly, algae retains moisture against render and accelerates wear. Thriving in the UK’s mild, wet weather, algae requires removal before staining and damage become more severe.
Black streaks
Mould, soot, or water runoff carrying pollutants down the wall will cause black streaks. They appear under windowsills, rooflines, or guttering and are a sign of inefficient drainage or water pooling. Addressing black streaks is essential, as they can become ingrained over time.
DID YOU KNOW?
Moss build-up
Thicker, green or dark clumps of moss will show on ledges, in corners, and at the base of walls, where water has accumulated. Holding moisture against the render, moss will slowly degrade the surface, especially if it’s old or a porous finish (monocouche or lime). Minor cracks or widening of hairline fractures may also appear from the moss root system.
General grime and pollution
The vehicle exhaust, industrial pollution, and dust will cause a slow buildup of grey or brown surface grime in urban properties or homes located near busy roads. Even if it doesn’t cause immediate damage, it will affect the render’s appearance and lead to difficult stains when combined with moisture.
Extra tip
Visually inspect the render periodically, especially after wet winters, to detect such issues early on. Address even the minor problems to preserve the render’s looks and lifespan.
Performance issues
Dirty, neglected render can also cause performance issues.
Damp walls
Algae, moss, and other organic growth hold moisture against your property’s surface. Over time, the render becomes saturated, especially if it’s older or of a porous type (such as sand and cement or lime render). When water doesn’t evaporate efficiently, it seeps through weak points and cracks, causing damp patches on internal walls. Plaster and paintwork will suffer, and a breeding ground for mould will appear indoors.
Poor insulation performance
Render isn’t an insulator, and many modern UK homes also have external wall insulation (EWI) beneath it. When grime, biological growth, or water ingress overlap, render’s breathability is compromised, causing cracking, and they will also alter the insulation layer beneath. In the winter, this will result in heat loss, higher energy bills, and a colder home.
Shorter lifespan for the render
A clean render is more durable than a dirty one. If left dirty, the render’s surface will break down more quickly due to UV exposure, moisture, and pollutants. Algae and mould will alter the binders in modern render, whereas the pressure and freeze-thaw cycles of moss roots will cause detachment and cracks. In the end, the render will likely require premature repairs or even full replacement, both of which are more expensive than cleaning.
Timing & UK climate aspects
The UK’s damp, changeable climate makes timing another significant factor in the durability of renders. To maintain its appearance, you have to know when to clean the render.
Best time of year: spring and autumn
The best time to clean render in the UK is spring and autumn. Now, the weather is mild and predictable. In spring, you remove algae and grime that collected over the winter. In autumn, you prepare the render for the cold and damp. Biological growth is more easily visible and manageable in the spring and autumn.
Never clean in freezing or extremely hot conditions, as it’s not efficient and you risk compromising the render’s integrity.
Recommended cleaning frequency
Render cleaning should be performed every 1-2 years, but your location and environment should also be taken into account. Clean your render every year if your home is located near trees, woodland, shaded areas, or is exposed to high moisture levels. In urban areas with limited vegetation and enough sunlight exposure, render cleaning is recommended every two years.
Due to airborne pollution and grime buildup, homes near roads or industrial zones require more frequent render cleaning.
Extra tip
Prevent long-term staining, moisture issues, and surface damage by maintaining a regular cleaning schedule in sync with seasonal changes.
Should you go DIY for render cleaning?
When DIY render cleaning is a good choice
DIY render cleaning can be safe and efficient in some scenarios, such as:
Ground-level render only
Any area that is easily accessible from the ground, such as a garden wall, a single-storey extension, or the lower part of your home, is a manageable DIY render cleaning project. As long as you don’t use any ladders, you can clean the render by yourself.
Light soiling or early staining
You can opt for the DIY route if you're dealing with light dirt, early-stage algae, or surface-level staining. If you haven’t cleaned the render for several years and it has black streaks, deep discolouration, or thick moss, you should call in the pros.
Sturdy surfaces (sand and cement)
Sand and cement—robust render types typically are safer to clean with gentle cleaning methods than delicate finishes. Light scrubbing or controlled hose rinsing won’t damage these renders.
No harsh chemicals or high-pressure equipment needed
If you choose to do it yourself, avoid using aggressive pressure washers or strong chemicals—they may damage the render and compromise your health. Instead, stick to mild, render-safe cleaning products and use soft brushes and low-pressure garden hoses. Should you need anything further, consider hiring a professional cleaning service.
All in all, DIY cleaning is recommended for small, low-risk jobs on easy-to-access areas, such as mildly soiled and durable surfaces. Call in the experts, though, if you worry about your safety, access, or render’s condition.
Safe DIY methods
Hand washing
The most cautious method is hand washing—you only need a bucket of warm water, a non-abrasive sponge or cloth, and a mild detergent that is safe for rendering. Don’t use bleach, patio cleaners, or any other harsh chemicals. Eco-friendly, pH-neutral soaps or a proprietary render-safe solution are recommended. You can hand wash small areas or test an area before cleaning a larger surface.
Low-pressure hose rinse
Using a garden hose, gently rinse the render—never attach a jet spray nozzle or a pressure washer. Use a standard nozzle that gives a wide, soft spray. You want to rinse away loosened dirt without damaging the surface. Avoid soaking areas with hairlines and weak points; instead, always spray downward.
Soft brushing
If there’s some difficult dirt or algae, loosen the surface grime with a soft-bristled, long-handled brush. Never scrub aggressively or use wire brushes, as you risk tearing the render’s surface or eliminating textured finishes. Instead, use light pressure and gentle, circular strokes. This is important for sand and cement render—cautious use is recommended for delicate kinds of render.
WORTH NOTING
In the UK’s wet climate, frequent rainfall can speed up algae growth and staining by up to 50% and reduce render lifespan by 5–10 years without proper maintenance.
The least efficient DIY method is hand washing, removing only 50–60% of surface grime, while soft brushing with detergent can remove up to 85%.
Risks and limitations of DIY render cleaning
DIY render cleaning is affordable, but it comes with some downsides.
Risk of damaging the render
Render surfaces, especially those made with K Rend, monocouche, and acrylic—modern types—can be incredibly fragile. If you use harsh brushes, high-pressure jets, or incorrect cleaning products, you may strip the colour, cause surface erosion, and even crack the render. Render repairs are costly and tricky to blend in with the current finish. Even if sand and cement render is more durable, it can still be affected by improper treatment and excessive scrubbing.
Height and access hazards
Reaching upper storeys, gables, or awkward corners is something you will encounter when cleaning render. If you don’t have the proper equipment, climbing ladders with buckets, hoses, or cleaning tools will be risky for your safety and health. Professional cleaners come equipped with mobile access platforms and scaffolding. If you cannot safely access the render from the ground, you shouldn’t try DIY cleaning.
Time and limited efficiency
DIY methods, especially gentle, render-safe ones, typically take a lot of time. You will spend many hours and may not even get a uniform clean, especially if the surfaces are large or soiled. You will need professional tools to remove black streaks, algae, and deep-rooted grime completely. With DIY cleaning, you may spend hours and still not achieve a satisfactory result.
In summary
DIY render cleaning is a solution sometimes, but only if the conditions are safe and manageable.
Hiring a professional render cleaner in the UK
When to hire professional cleaners
Even if a sponge and a hose will suffice in some rendering cleaning jobs, more often than not, you need to call in the pros.
High walls or difficult-to-reach areas
Hire the pros if the render goes upper storeys, dormers, or awkward gables. They carry adequate access equipment—scaffolding and MEWPS (mobile elevating work platforms)—and clean safely and efficiently at height.
Thick algae or difficult staining
Specialist soft washing or steam treatments will be necessary for heavily soiled render, especially when streaking, black mould, or deep green algae are present. To lift organic buildup without damaging the surface, the advanced methods require chemical pre-treatments, controlled application, and dwell time management.
Listed or heritage properties
It’s vital to call in the pros if your home is listed, in a conservation area, or has traditional render, such as lime. The materials are sensitive and irreplaceable, most of the time. Professionals will employ non-invasive techniques and correct products to preserve the render and the property’s status.
Common professional techniques
Soft washing
Used often for modern renders like acrylic, monocouche, and K Rend, soft washing is one of the most popular techniques. Using low-pressure water with specific biocidal or chemical treatments, soft washing will kill algae, moss, and mould at the root. It’s perfect for fragile surfaces that don’t withstand forceful cleaning. It gives visible results within hours, and the treatment has ongoing effects, preventing regrowth.
Steam cleaning
Steam cleaning is a chemical-free technique that eco-conscious homeowners prefer. The method is recommended for sensitive renders, such as those made from lime or heritage surfaces. Using superheated water vapour, steam cleaning gently lifts dirt, algae, and grime without damaging the material underneath. Since it doesn’t employ harsh pressure and chemical runoff, steam cleaning is adequate for period properties or those under conservation regulations.
Controlled pressure washing
Pressure washing is rather avoided on modern and textured renders, but it’s a good choice for harsh, more resilient surfaces like sand and cement. When there’s precise control of pressure levels and spray angles, the risk of damage is minimal. To loosen dirt and organic growth, pressure washing can be used with pre-treatment solutions.
Experience is essential—here’s why!
Hiring professional render cleaners doesn’t guarantee better results—it’s also about protecting your property and safety. Here’s what hiring the pros gets you:
Insurance, health, and safety compliance
Expert cleaners carry insurance and are professionally trained in safe cleaning techniques. They know how to work at heights, handle chemicals, and use specialised equipment. Should anything go wrong during the cleaning process, the company will cover any costs associated with repairs or accidents that may occur.
Correct cleaning products and techniques
Savvy professionals know how to identify K-Rend, lime, monocouche, and other types of render and correctly choose the cleaning method. They avoid common mistakes that could cause permanent damage or staining because they are knowledgeable about render cleaning, from selecting the right biocidal treatments to applying the correct pressure and dwell times.
Protect your investment
Render isn’t just for the appearance, but also matters for your house’s weather resistance and insulation. Improper cleaning will alter the render, shorten its durability and even void warranties. A professional cleaner will protect your property’s appearance, performance, and value by cleaning the render correctly.
What to expect from a professional cleaning
Pre-clean inspection
Professional cleaners are meticulous, so before proceeding with cleaning, they conduct a comprehensive assessment of the property. This way, the render cleaning will be safe and efficient. This inspection helps them to:
Identify the render type
Distinct renders require specific cleaning approaches—a method safe for sand and cement may damage lime render, for example. A professional cleaner will correctly identify the render type, texture, and any existing coatings. They will choose the method and products that are compatible and efficient for your render.
Assess the condition and access
The cleaner will also look for any signs of damage, such as flaking, cracks, or previously patched areas. The vulnerable spots may require gentle methods or repairs before cleaning can be performed. The professionals will also examine the best way to access the rendered surfaces, determining if ladders, scaffolding, or mobile platforms are needed.
The pre-clean inspection prevents expensive mistakes, ensures compliance with regulations (especially if the property is listed), and helps cleaners create a customised cleaning plan.
The cleaning process
One reason why professional cleaning is more effective than DIY is that it’s structured, with a multi-step approach.
Targeted pre-treatments
Professionals start by applying biocidal or algae-killing treatments right to problematic areas, such as difficult dirt, black mould streaks or green algae patches. The treatments will break down organic growth at the root and ensure a deep, long-lasting clean. For maximum efficiency, the cleaners will correctly manage dwell time.
QUICK FACT
Soft washing is the most efficient professional method, removing up to 95% of organic stains, while controlled pressure washing is the least efficient for delicate renders (removes 70–80%).
Professional soft washing has a low accident risk of around 5–10%, steam cleaning carries a 10–15% risk due to hot equipment, while controlled pressure washing poses the highest risk at 20–30%.
Controlled application
Based on the render type, the cleaners will apply the appropriate cleaning technique: low-pressure soft washing, steam, or carefully controlled pressure washing. They will clean without affecting the render’s finish, colour, and integrity. Before cleaning, the professionals will protect the nearby windows, landscaping, and fittings from runoff or overspray.
Thorough rinsing
To remove all residual cleaning agents, dirt, and loosened debris, the cleaners will thoroughly rinse down the render. This way, they improve the appearance and prevent any chemical buildup that might harm nearby plants, finishes, and render the performance ineffective. They aim for a clean, uniform surface with no missed spots or streaks.
Aftercare and protection
Professional render cleaning doesn’t end with rinsing. To expand the efficiency of cleaning and protect the render for the longest time, the professionals will also do the following:
Apply protective coatings (optional)
To prevent future staining and organic growth, many professionals recommend water-repellent or biocidal protective coatings. They will function as a barrier against pollution, moisture, moss, and algae. The coatings are especially suited for properties in damp, shaded, or high-pollution areas, as they maintain the home’s appearance for a longer time and extend the time between cleans.
Ongoing maintenance recommendations
Reliable cleaners will give you recommendations on how to care for the render after cleaning it. They will instruct you on how often to check it, when to schedule the next cleaning, and how to manage minor marks or algae. Efficient maintenance keeps the render in top condition and prevents expensive repairs or premature deterioration.
Final quality check
Before leaving, the cleaners will conduct a detailed inspection with you. This way, you make sure that the property is treated, rinsed, and cleaned. Should you find any missed spots, stains, or issues, the cleaners will promptly address them. A dependable cleaning team will only leave after you are satisfied with the results.
Cost Comparison: DIY vs Professional Cleaning
DIY costs
At first glance, going the DIY cleaning route appears to be the most cost-effective choice. However, you must consider the bigger picture and account for the actual render cleaning cost, both upfront and in the long run.
Tools, detergent, and time
To clean your render, you will need various supplies, including soft brushes, buckets, specialised cleaning solutions, protective gear, and even a low-pressure hose attachment. Even if none of the above is expensive, the costs will quickly add up, especially if you don’t have any of them before cleaning.
Remember that you will also spend a significant amount of time, and likely a considerable portion of your free time. To clean your render properly, even at ground level, you will need to put in a lot of elbow grease and time. While professionals might clean in a couple of hours, you might need even a whole weekend to scrub, rinse, and climb up and down to finish the job.
Possible repair costs if DIY goes wrong
The most significant hidden cost of DIY cleaning is what do you do if you damage the render? Using the wrong chemical, applying too much pressure, or failing to spot early cracks can lead to a range of unpleasant consequences, including discolouration, crumbling surfaces, or trapped moisture. A DIY clean that goes awry may require professional help for fixes—this can be both stressful and expensive.
Maybe the numbers will speak louder:
Total estimated spend (basic job): £55–£135.
If things go wrong, your spending will increase even more:
All in all, DIY cleaning will save you upfront, but may end up costing you more when repairs are needed from incorrect cleaning.
Pricing for professional render cleaning
Hiring professional render cleaners isn’t cheap, but you get reliable, comprehensive service, expert care, and, more importantly, peace of mind. The pricing in the UK for render cleaning ranges from £300 to £1,200, based on several factors:
You will pay less for a small bungalow with light soiling, but you will have to open your wallet if you have a large detached home, a multi-storey property, or a delicate render. Render with heavy algae will also sit closer to the top.
The price for professional render cleaning will cover:
The following chart will help you better understand the costs for professional render cleaning services in the UK:
Category
Details
Estimated Cost Range (GBP)
By Property Type
Based on average UK home sizes
Small terrace / 1–2 walls
Light coverage, no major access needs
£300 – £500
Semi-detached / 2–3 walls
Moderate access, common render types
£500 – £700
Detached / 3–4 walls
Full house clean, access often required
£700 – £1,000
Large/multi-storey homes
Includes scaffolding, complex render
£1,000 – £1,200+
By Render Type
Material-specific care
Sand & Cement
Durable, pressure-washable
£300 – £600
Monocouche
Fragile, soft wash only
£400 – £700
K Rend (Silicone)
Self-cleaning, needs biocide for algae
£500 – £800
Acrylic
Flexible but sensitive to high pressure
£500 – £800
Lime Render
Heritage requires a gentle steam/soft wash
£600 – £1,000+
Polymer
Manufacturer-specific care required
£400 – £700
By Algae / Staining Level
Adds to the base cost if present
Light discolouration
General grime only
+£0 – £100
Moderate algae/moss
Needs biocide + longer dwell time
+£100 – £200
Severe staining (green/black)
Deep soak, multiple passes
+£200 – £400+
Additional Costs
Project-dependent add-ons
Scaffolding/access gear
For multi-storey or hard-to-reach areas
£100 – £300
Protective coatings
Water-repellent or anti-fungal treatments
£150 – £400 (optional)
INTERESTING FACT
The size and access difficulty of the property are the most significant cost factors, affecting up to 60% of the total price.
The type of cleaning solution used is the least impactful, typically accounting for just 5–10% of the final bill.
Long-term value
Even if professional render cleaning is more expensive upfront than DIY cleaning, the long-term value often outweighs the initial spending. Here’s why:
Time saved
Render cleaning takes time and energy, especially when you don’t know much about it. When you hire the pros, they will work faster, more efficiently, and won’t disrupt your daily activities. What you will complete in a weekend, pros will probably complete in a few hours.
Lower risk of damage
Professionals know how to clean all sorts of render without causing damage. Nine times out of ten, DIY cleaning will lead to discolouration, cracks, or moisture issues. Why spend hundreds of pounds on repairs when you could have avoided the damage in the first place?
Longer-lasting results
Thanks to the professional-grade tools and biocidal treatments, the results will last longer than with DIY attempts. Professional cleaners handle the root algae, moss, and grime, and don’t stop at surface-level results. A professional clean will reduce the need for frequent re-cleaning and improve your home’s appearance.
Keeping your render clean year-round
Prevention tips
Render will maintain its appearance and functionality if it benefits from regular upkeep between cleanings. The following prevention tips can go a long way:
Trim back vegetation
Overgrown plants, shrubs, and climbing vines trap moisture against the walls, creating a perfect breeding ground for algae and moss. To ensure air circulation and dry walls after each rain, keep greenery well trimmed and away from the render.
Take care of gutters and drains
If the gutters and downpipes are blocked, the rainwater will overflow and run down the walls, causing damp patches, dark streaks, and staining. Minimise water exposure on the render by regularly clearing debris and addressing leaks as soon as they are noticed.
Clean stains early
Handle any patch of algae or dirty streak the moment you notice it. Remove by gently brushing or rinsing light soiling before it gets settled or spread. Early action prevents problems from aggravating, which may require professional help.
Routine maintenance
Regular maintenance is essential, as it prevents minor problems from escalating into severe and expensive ones.
Spot-check quarterly
Every few months, walk around your house and look for signs of algae, cracks, staining, or damp patches. Pay extra attention to shaded or damp areas –they are vulnerable to organic growth. Spot-checking helps you detect and address problems before they escalate.
Schedule professional cleaning every 1-2 years
Your location matters a lot for the frequency of render cleaning. Typically, a professional render clean is recommended every 12 to 24 months. This way, the render stays free from difficult grime and maintains its appearance and performance.
Protective add-ons
After the render is cleaned, a protective treatment can be applied to keep it looking fresh for the longest time. The add-ons are optional, but they provide long-term benefits and justify the extra cost.
Water-repellent coatings
Thanks to the invisible treatments, water will no longer be absorbed, but will be shed by the render. When surfaces stay drier, moss, algae, and mould will grow more slowly—it’s so important in the damp UK climate. The water-repellent coatings also reduce the risk of water ingress, protecting the render and the house’s structure.
Anti-fungal treatments
Antifungal or biocidal treatments ensure durable protection by neutralising spores and microorganisms. Such treatments are highly beneficial for properties in shaded or moisture-prone areas. They are highly efficient after a soft wash or steam clean, extending the time between cleans.
Although coatings and treatments increase the cost of cleaning services, they are well worth the investment. The benefits are numerous: they extend the durability of the render, reduce the frequency of deep cleans, and preserve the house’s curb appeal. Since they decrease wear and need for repairs, the add-ons will save money in the long run.
Steer away from these mistakes
Common DIY mistakes
DIY render cleaning has its benefits, but it comes with risks when done poorly. Here are the most common mistakes:
Overuse of pressure washers
Pressure washers offer quick results, but using high pressure on render, especially on soft types like K-Rend or monocouche, can dislodge finishes, erode the surface, and even crack the render. Only low, controlled pressure and careful pressure washing should be used on robust renders, such as those made from sand and cement.
Using bleach or harsh chemicals
Even though household bleach and acidic cleaners kill algae in the short term, they may also stain, damage the render, or react with materials in the wall. Such solutions may also contaminate drainage, harm nearby plants, and alter protective coatings.
Skipping safety steps
When cleaning the render, ladders or working close to electrics and slippery surfaces will be involved quite often. Failing to wear personal protective equipment (PPE), ignoring height safety protocols, or cleaning without proper supervision may lead to severe injuries and accidents. Safety should come first, always.
Hiring the wrong contractor
Just because you hire professional cleaners doesn’t mean you hired dependable, expert ones. Here are some red flags to watch out for when choosing a cleaning company:
No insurance
A dependable cleaning company will carry public liability insurance and employee coverage, too (ideally). If it doesn’t, you may need to cover the bill in case of any accidents on-site or property damage. Ensure that the cleaners have up-to-date insurance documentation before they begin cleaning.
No experience with your render type
Some renders, such as lime or K-Rend, require specific cleaning techniques to maintain their appearance. If the cleaner lacks experience with your render type, they may use the incorrect method or product, which can result in severe and expensive damage to the render.
Misleading pricing and non-transparent communication
When the estimate isn’t precise, changes all of a sudden, or the contractor can't or doesn’t want to break down the costs, you should look for another company. A dependable team will offer transparent pricing, clear timelines, and a detailed explanation of their process. Poor communication is a red flag that can lead to issues during and after the cleaning process.
DID YOU KNOW?
Water-repellent coatings reduce moisture absorption by up to 95% and significantly slow algae growth.
Basic anti-fungal washes, while helpful, are the least effective long-term, offering only around 50–60% protection and typically lasting just 6–12 months without reapplication.
Environmental & safety considerations (UK-focused)
Eco-conscious cleaning
Render cleaning shouldn’t affect the environment. Here are some mindful choices to consider:
Biodegradable products
Use bio-degradable and non-toxic products that safely break down in the environment and don’t harm local wildlife, waterways, and soil. Many professional-grade soft wash treatments are eco-friendly while remaining efficient.
Prevent runoff into drains.
Ensure that runoff water, mainly when containing chemicals, doesn’t enter street drains directly. Divert water onto gravel or soil with sandbags and cover nearby gullies. You want runoff to disperse safely and naturally.
Protect lawns and gardens.
With render cleaning, water and cleaning agents are commonly used, which can affect nearby plants. Before you start cleaning, use waterproof sheeting to cover flower beds, pots, or grass. To dilute any overspray, rinse them down after cleaning. Professionals typically use low-toxicity treatments with minimal impact on the garden.
Safety musts
Safety should never be compromised, regardless of whether you opt for DIY or professional services. Here’s how to avoid accidents and protect everyone:
Use PPE (Personal Protective Equipment)
Always wear the proper equipment: gloves, eye protection, and non-slip footwear, especially when handling cleaning solutions. If you use chemical treatments, protect yourself from inhaling vapours and wear a face mask. PPE is vital even for a job that seems low-risk.
Secure ladders and scaffolding
Place the ladders on stable ground, ensuring they are correctly angled to reach the upper-storey render. Ideally, it should be footed by another person. If the area to clean is vast, using scaffolding is a much more stable and safer option. Don’t stretch or overreach from height—you risk an injury.
Keep children and pets away
Cleaning can lead to slippery surfaces, the use of cleaning agents, and even the use of hazardous equipment. Keeping children and pets away from the cleaning area is vital. Continue until everything has been rinsed, cleaned, and is safe to walk on again.
FAQs
How often should render in the UK be cleaned?
Typically, every 1-2 years is sufficient, but this timeframe depends significantly on factors such as pollution, weather exposure, and local vegetation.
Is it possible to paint over dirty render?
No! Painting over algae or dirt will trap in moisture and lead to mould or flaking. If you want to paint over render, you must first clean it.
How is soft washing different from pressure washing?
Soft washing involves using low pressure and cleaning solutions to kill algae, whereas pressure washing uses high pressure. If misused, pressure washing may damage render.
Does rendering cleaning damage walls?
Not if done correctly. When you use the correct cleaning method, you avoid damage to the walls.
What is the ideal time of year to clean render?
Spring or autumn is perfect for render cleaning. The weather is milder, evaporation is rapid, and there is a lower risk of freezing. The conditions for drying and applying protective treatments are perfect.
How much will the cleaning cost me?
Expect to spend £300–£1,200 for professional cleaning. The render type, property size, and render’s condition will directly impact the costs for cleaning.

How do you clean a roof?
Roof tile manufacturers adivce on cleaning Roofs
Avoid walking on roof tiles whenever possible, as even if they don't break under your weight, they may develop hairline cracks that go unnoticed. These cracks can expand during freeze/thaw cycles, resulting in tile breakage later on, typically during winter.
When cleaning a roof, it is crucial to avoid using high-pressure jet washers. The forceful spray from such equipment can damage the tile finish and strip away colour from concrete tiles. Additionally, high-pressure water can seep into the interlocks and headlaps, potentially causing water ingress. If a pressure washer is used, it should be set to low pressure and directed from the apex of the roof downwards, never upwards, to prevent water from entering beneath the laps of the tiles.
To remove moss and algae from roof tiles, a trowel or stiff brush can be utilized. This task is best performed on a dry day when the moss is less moist and more easily dislodged from the tiles. After removing moss and algae, consider applying fungicides and anti-moss treatments specifically designed for roofs. These products are available at most DIY stores, but we as a manufacturer are unable to advise on adequate products. It is essential to carefully follow the instructions and take any necessary safety precautions. However, keep in mind that these treatments are not a permanent solution, and ongoing monitoring and maintenance will still be required.
Mr Softwash Ltd
Most Roof cleaners use Jet/pressure washers, using pressure or steam cleaning to clean roofs and also walk on roofs. This is clearly against the advice of tile manufacturers and negates any warranty on your roof. We do not walk on your roof and we clean roofs by soft washing only, no high pressure or steam cleaning.
We scrape roofs with long lances and then treat the roofs with biocide by spraying as recommended by the tile manufacturers. This is a Soft washing process which doesn't cause any damage to our customers roofs.

Why Pressure Washing Roof Tiles is the Wrong Approach A Message for Homeowners and Roof Cleaning Professionals
By Mark Cave July 10, 2025
Why Pressure Washing Roof Tiles is the Wrong Approach. A Message for Homeowners and Roof Cleaning Professionals
Roof cleaning has become a hot topic on social media and video platforms. Increasingly, we see exterior cleaning contractors and training professionals creating videos claiming that pressure washing including flat surface cleaners, turbo nozzles, and hot water systems is a safe and acceptable method for cleaning roofs in the UK.
At SoftWash UK , we believe this advice is not only misleading but could also lead homeowners and new cleaning professionals into making costly mistakes. We’ve carried out extensive research, referencing manufacturers, trade bodies, and authoritative sources, all of which agree: Pressure washing roof tiles is not recommended and carries significant risks.
What the Pressure Washing Videos Are Saying
Many recent videos share a similar message. For example, a typical video transcript explains:
“Now, you’re starting to see roof cleaning becoming much more common... and you’re seeing people using these [turbo nozzles] quite a bit. This is actually the most intensive tool you can get for pressure washing… it concentrates all that cleaning power to one point and then it spins really rapidly…
…So for roof cleaning especially, I much prefer to use something like this, my flat surface cleaner, because it uses fan jets… so the cleaning power will now be spread across a bigger area of the surface… Not only that, but there’s two of them… So this is much more gentle.”
“…I prefer to use the reduced amount of pressure… and chemical treatment helps remove moss… The chemical will kill any fragments of organic growth that might be left on the surface and prevent them growing back for at least 2 years.”
While these videos may be well intentioned, they miss a crucial point: even when using fan jets or a flat surface cleaner, you are still applying significant high pressure water to roof tiles. Manufacturers and industry bodies are clear that this is risky, unnecessary, and often more damaging than leaving moss in place for a while longer.
Why Roofs Are Not Like Driveways or Patios
One of the arguments often made in these videos is that roof tiles are simply “slabs of concrete, just like paving.” While the basic material may be similar, a roof is fundamentally different:
As Marley Roofing clearly states (available in their Technical Q&A or by contacting their Technical Team):
The Real Problem with Pressure Washing Roofs
When you use a pressure washer even with so called “gentle” attachments you risk:
For example, Wienerberger (maker of Sandtoft tiles) states:
Similarly, Forticrete warns (via their technical advice and product guidance):
Moss on Roofs: Is It Really That Dangerous?
Pressure washing advocates often claim moss is damaging the roof and must be blasted away. It’s true that moss holds moisture and can eventually lead to issues, but this damage happens slowly over years. In contrast, the damage from a pressure washer can occur in a single afternoon.
Tudor Roof Tiles advises in their publicly available Care Guide:
“Remove heavy moss by chemical wash or careful hand scraping… Pressure washing should never be used on our clay tiles.”
Even the Roof Tile Association (RTA) echoes this message, though their documents require download:
Why the Industry Pushes Pressure Washing
Let’s be honest about why many contractors promote pressure washing. Scraping moss manually from a roof is hard work. It’s time-consuming, physically demanding, and takes patience. Using a pressure washer is quicker and gives instant visual results. That’s why many in the industry want to justify it even when manufacturers say otherwise.
But the truth is simple:
Even in the transcript shared above, the contractor acknowledges that a turbo nozzle “can do some damage” and that there’s a mess to clean up afterwards. Yet they still argue for pressure washing because it’s “much more gentle” when using fan jets. The manufacturers disagree.
The Safe Way to Clean Roofs
At SoftWash UK, we strongly advocate the method recommended by all major tile manufacturers and professional roofing associations:
This method:
For example, NFRC (National Federation of Roofing Contractors) advises homeowners (accessible via their publications page):
Informed Decisions Protect Roofs
Pressure washing a roof might look impressive on video but the reality is starkly different. The potential for surface damage, water ingress, cracked tiles, and voided warranties far outweighs the quick visual win.
We urge both homeowners and cleaning professionals to trust the evidence and follow the guidance of manufacturers and industry bodies. The safest, most effective, and professional way to clean a roof in the UK is:
This approach protects both the integrity and the lifespan of your roof and your wallet.
Remember, your roof isn’t just a surface it’s your home’s first line of defence. Treat it with the respect it deserves.
For more information on safe roof cleaning practices, visit:
What can be softwashed?
Because of its gentle approach, softwashing is suitable for a wide range of surfaces that could be damaged by high-pressure cleaning. These include:
A maintenance programme of soft washing is the safer
and cheaper way to maintain your property's appearance.


Removing Black Spot
Black spots on a patio are caused by
black lichen, an organic growth that embeds itself deep into porous surfaces like stone and concrete. Untreated black spot will grow bigger and infest your concrete or stone. Standard pressure washing will not remove it effectively and can make the problem worse over time. The most effective method is to use a specialized black spot remover that contains biocide.
How to prevent black spots from returning
Mr Softwash can treat black spot and other organic growth and arrange a treatment plan to stop regrowth.

Mr Softwash utilizes a soft washing method to remove moss, weeds, and lichen, advocating for it as a safer alternative to high-pressure washing for delicate surfaces like render, roofs, patios and driveways.
This process involves applying a biodegradable cleaning solution with low pressure, allowing it to dwell to kill organic material, followed by rinsing and an optional biocide treatment for longer-lasting results. For more information, visit Mr Softwash.
Mr Softwash®
Softwash Driveway Cleaning
Softwashing is
a gentle, low-pressure cleaning method for driveways that uses specialized chemical solutions to remove algae, moss, and other organic growth. Unlike high-pressure jet washing, softwashing sanitizes the surface, killing growth at its roots for a more thorough and longer-lasting clean.
How softwashing works
The process involves a few key steps performed by a trained operator:
Softwashing vs. pressure washing
Feature
Softwashing
Pressure Washing
Cleaning method
Relies on biodegradable chemicals to kill and break down organic matter.
Relies on the brute force of high-pressure water to blast away dirt.
Pressure used
Very low pressure (under 500 PSI), about the strength of a garden hose.
High pressure (1,500–4,000+ PSI).
Best for
Delicate or porous surfaces like tarmac, resin, or older block paving where mortar joints could be damaged. Also highly effective against organic growth.
Durable, hard surfaces like new concrete or very stubborn stains like oil and heavy grease.
Longevity
Longer-lasting results because it kills organic growth at its source, preventing it from returning quickly.
Shorter-term results, as it often only cleans the surface, allowing moss and algae to regrow faster.
Safety and risk
Very low risk of surface damage. Safer for plants and the surrounding environment when handled properly.
Higher risk of damaging delicate surfaces, such as eroding mortar joints in paving or chipping paint.
Driveway materials suitable for softwashing
Softwashing is particularly useful for driveways made from:
Soft washing a driveway
uses low-pressure water combined with specialized cleaning solutions to safely remove organic growth and stains without damaging the surface. This method is gentler than high-pressure washing, which can erode surfaces like concrete and ruin block paving joints.
How soft washing works
Why Soft Wash Driveways?
You should soft wash driveways because it uses gentle, biodegradable cleaning solutions to effectively kill algae, mold, and mildew, preventing damage to the driveway's surface from harsh pressure washing. This method offers a deeper, longer-lasting clean by eliminating organic growth at its roots, maintaining property value, preserving the driveway's surface integrity, and providing a more appealing and safer surface.
Benefits of soft washing driveways:
Prevents Surface Damage:
Unlike aggressive pressure washing, soft washing uses low pressure and gentle chemicals, protecting delicate surfaces like tarmacor resin from damage and erosion.
Eliminates Organic Growth:
The biodegradable cleaning solutions are specifically designed to kill mold, algae, moss, and lichens at their source, not just their visible surface.
Longer-Lasting Results:
The biocides in the solution have a residual effect, preventing organic growth from returning for a longer period, sometimes 3-5 years, compared to a pressure wash.
Boosts Property Value:
A clean, well-maintained driveway enhances your home's curb appeal and preserves its overall value.
Enhances Safety:
Removing slippery moss, algae, and other organic growth makes the driveway safer to walk or drive on.
Deeper, More Thorough Clean:
Soft washing reaches deep into the pores of the driveway material to eliminate underlying issues, providing a truly sanitized surface.
Environmentally Friendly:
The biodegradable chemicals used are safer for your plants and the environment compared to harsh chemicals.
Professional Driveway cleaning
Professional cleaners use commercial-grade equipment to remove dirt, grime, and moss efficiently and effectively. Many services offer additional options like re-sanding for block paving and protective sealant application.
Cleaning based on surface material
Benefits of hiring a professional

Although soft washing chemicals can be hazadous while being applied, using the correct biodegradable soft washing chemicals means that once the chemicals have dried they break down naturally into the eco system.
Softwashing primarily uses a solution of
sodium hypochlorite (bleach), water, and a surfactant or specialist biocides. Other specialized chemicals like specific biocides, alkaline builders, and rust removers can be used for specific stains or long-term growth inhibition.
Core Chemicals
Specialized Chemicals
Safety Considerations
Softwashing chemicals, especially sodium hypochlorite solutions, are classified as hazardous and corrosive goods. It is crucial to:
Conclusion
To employ a trained soft washing professional who knows the type of chemicals to use on each surface at the correct ratios is the long term cheapest and safest way to keep your property clean.


You shouldn't clean render with pressure washers because
the high-pressure water can cause permanent damage, such as stripping the surface, causing etching, and driving moisture deep into the walls, which can lead to cracks and further structural problems. Pressure washing also doesn't kill underlying organic spores like algae, so stains and regrowth will quickly return, often more prominently on the etched surface.
Specific reasons to avoid pressure washing render
How to clean bricks
Everything you need to know about cleaning brickwork,
including removing efflorescence and mortar.
One of the key benefits of using clay facing bricks is that brickwork usually requires little maintenance over the course of its life. However, there may be times when you need to clean brickwork – this guide covers how to clean clay brickwork and remove the most common types of stains you may see on both old and new brickwork.
The information provided here is intended as guidance, but we highly recommend consulting a brick cleaning expert, especially for stains that are extensive or hard to identify, as the method of cleaning depends on the nature of the stain.


cleaning brickwork with biocide
Cleaning brickwork with a biocide is
an effective and safe method for removing organic growth like moss, algae, and lichen. This approach, often referred to as soft washing, uses low pressure and is preferable to high-pressure washing, which can damage porous bricks and mortar joints.
Biocide in Brick Cleaning
Step-by-Step Application
Always follow the manufacturer's instructions, perform a patch test on an inconspicuous area, and wear appropriate personal protective equipment (PPE).
For heavy-duty or stubborn stains, it is often recommended to use a professional service that has expertise in selecting the correct chemicals and methods for different types of brickwork.
Don't Pressure wash Brickwork
Dirt and grime on brickwork
Airborne soot and dirt will naturally build up on brickwork over time, depending on the location of the building. This is natural and will not damage the brickwork, but may impact the look of the building.
How to clean dirty brickwork
Use softwash chemicals to remove the contamination on the brickwork and apply to the brickwork using a nylon brush or sprayers. Never use a wire brush or metal tools to clean, as this can damage the brick face. Avoid cleaning brickwork in very cold conditions, as the wet brickwork will freeze, which many cause damage.
High pressure washing is not recommended for brickwork. Despite bricks being highly durable when designed and constructed correctly, brick surfaces and mortar joints can be damaged under high pressure, leaving the brickwork vulnerable to water penetration and frost attack.
If you wish to clean a historical building with older brickwork, a survey should be carried out by a specialist brickwork cleaning contractor to avoid damage.

Why Cheap Driveway Cleaning Often Leads to Damage
What does a customer truly pay for when they order professional exterior cleaning such as driveway, render or patio cleaning ?
In recent years, more and more cleaners have adopted one strategy:
being cheaper than everyone else.
At first, this may sound appealing to customers.
But in reality, it harms them, harms genuine professionals, and slowly destroys the entire market.
This article is not about complaining — it’s an honest explanation of why high-quality, long-lasting exterior cleaning is cheaper in the long run, and why “cheap” services often end up being the most expensive mistake.
I Didn’t Just Buy Equipment – I Invested in Expertise
Many newcomers buy a machine, watch a video and start offering “driveway cleaning” for very low prices.
If they’re lucky, they do no major damage.
If they’re unlucky, they:
I spent one full year learning from a real professional.
Job after job, I observed, assisted, took notes and mastered the correct pressure, technique and workflow.
I also completed paid training courses, learning:
This knowledge isn’t free.
And it shouldn’t be.
I never experiment on a customer’s driveway.
I know exactly what will happen, how long it will take, and how to achieve the best possible, long-lasting result.
How Licensed Chemicals Extend the Life of Your Driveway
The specialist chemicals I use require training — both theoretical and practical.
They are not cheap, and that is exactly why they work.
Benefits for the customer:
Many cleaners claim to use professional products…
but in reality, they apply cheap, ineffective solutions that fail within months.
My chemicals attack the root systems of moss and algae, creating a long-lasting driveway clean that saves customers money over time.
Affordable, Not Cheap – What That Means for Your Surface
The driveway cleaning industry is full of people racing to the bottom with low prices.
But someone can only be that cheap if something important is missing:
The result?
Being “the cheapest” is not a business model —
it is a warning sign.
I am affordable exterior cleaning, not “cheap exterior cleaning”.
And there is a huge difference.
My goal is long-term quality, not rushed, corner-cutting jobs.
My Four-Step Professional Driveway Cleaning Process
1. On-Site Assessment
I personally inspect the surface.
I discuss what the customer wants to achieve and when the cleaning should take place.
2. High-Pressure Cleaning
Using professional equipment, I remove:
This is the foundation of professional exterior cleaning.
3. Application of Licensed Chemicals
My licensed chemicals ensure both an immediate clean and a long-lasting protective effect, slowing moss regrowth dramatically.
4. Next-Day Block Paving Restoration
For block paving, I return the next day to apply clean dried sand, restoring the joints and stabilising the surface.
This gives the customer a driveway that looks almost new — at a fraction of the cost of replacement.
A Fair Price Is Not Luxury – It’s a Guarantee
When a customer books me, they’re not just buying a cleaning service.
They’re securing:
A fair price reflects high-quality work — not extravagance.
Frequently Asked Questions (People Also Ask)
Is driveway cleaning worth it?
Yes — proper cleaning prevents damage, slows moss/algae regrowth and keeps your home looking better for longer, especially when using licensed chemicals.
How often should you clean block paving?
Most driveways stay clean for around a year with standard cleaning —
but with licensed chemicals driveway cleaning, cleanliness can last significantly longer.
Why does moss come back after cleaning?
Moss regrows quickly if only the surface layer is removed.
My chemicals target the root system and slow regrowth dramatically.
My Message to Customers and Fellow Cleaners
This post is not an attack on anyone.
But I strongly believe this:
Quality has a price.
Bad work has consequences.
If a cleaner is unrealistically cheap, something essential is missing.
If you want lasting quality, you must invest in it — and in the long term, quality is always cheaper.
To fellow contractors:
Don’t devalue the trade.
Fair pricing is the foundation of our profession.
I’m Affordable – But Never Cheap. And There’s a Very Serious Reason for That!
Render Soft Washing
Krend | Monocouche | Parex | EWI
Benefits of Softwashing for Render
Protects delicate render:
Modern render surfaces are porous and can be easily damaged by the force of high-pressure cleaning. Softwashing uses gentle chemicals and low pressure to prevent surface damage.
Effective biological control:
The chemical solutions kill algae, moss, and other organic growth at their root, preventing them from returning.
Restores original colour:
Softwashing cleans the render, restoring its natural colour and preventing future staining.
RENDER TYPE
Appearance & Finish Options
Best Suited For
Considerations
CEMENT RENDER
Smooth or textured. Classic finish.
Modern brick or block homes. Budget-conscious projects.
Can crack if walls move. Requires periodic painting.
LIME RENDER
Smooth or fine textured. Natural, soft finish.
Older solid-wall homes, listed buildings and period properties.
Longer curing time. Requires skilled application. Higher cost
ACRYLIC RENDER
Smooth or lightly textured. Vibrant colour options.
New builds or decorative facades.
Limited breathability. Less suitable for older homes.
POLYMER RENDER
Smooth or textured. Flexible and durable.
Older homes with minor wall movement. Exposed locations.
Less breathable than lime. Higher material cost.
SILICONE RENDER
Smooth, fine or scraped texture. Long-lasting colour.
Coastal or exposed homes. Low-maintenance facades.
Higher upfront cost. Careful colour matching required.
MONOCOUCHE RENDER
Smooth or scraped. Through-coloured
New builds, time-sensitive projects or modern homes.
Slightly less flexible than silicone. Limited colour range.
INSULATED RENDER SYSTEMS (EWI)
Smooth or textured. Over insulation. Modernised look.
Older solid-wall or exposed homes. Energy-efficiency upgrades.
High installation cost. Requires experienced installers.
SMOOTH FINISH
Sleek, flat, minimalist look.
Modern builds or urban properties.
Shows wall imperfections. Requires careful preparation.
SCRAPED FINISH
Subtle, uniform texture.
Residential homes or period properties with minor wall imperfections.
Texture may collect dirt over time.
TEXTURED FINISH
Fine grains to pronounced swirls.
Feature walls. Period properties.
Requires skill for consistent pattern. Can collect dirt.
PEBBLE DASH
Rough, stone-studded surface.
Coastal/exposed properties. Traditional residential homes.
Can look dated. Limited colours. Difficult to repair.
TYROLEAN FINISH
Fine splatter, uniform texture.
Renovations, older homes or uneven walls.
Specialist equipment required. Limited decorative variation.
ROUGHCAST
Integrated aggregate. Rustic texture.
Rural or traditional cottages. Exposed areas.
Heavier than other finishes. Style not suited to all modern homes.
Is Soft washing with biocide
the best method for cleaning render?
Yes, bleach can damage render if used incorrectly, primarily through discolouration and surface degradation. While sodium hypochlorite (the active ingredient in bleach) is a standard professional tool for "soft washing," bleach is often too strong or if used at improper dilutions for delicate surfaces like Krend and Monocouche renders.
How Bleach Can Damage Render
Steam cleaning render
Steam cleaning ( Doff/Torc ) render is highly effective for removing heavy carbon staining or paint, but lacks the long term residual protection against algae that biocides provide.
soft washing with a biocide is widely considered the best, safest and longest lasting method for cleaning modern exterior renders like K-Rend and Monocouche.
We need your consent to load the translations
We use a third-party service to translate the website content that may collect data about your activity. Please review the details in the privacy policy and accept the service to view the translations.